Quantcast
Channel: BEAUTY & LE CHIC
Viewing all 195 articles
Browse latest View live

Pimp My Hot Cloth Cleanser

$
0
0

Cleanse & Polish™ Hot Cloth Cleanser Jasmine & Osmanthus Limited Edition £20.75

As with any relationship, it’s good to spice things up from time to time. As much as I love and am devoted to Cleanse & Polish Hot Cloth Cleanser - I mean I’ve gone on, and on, and on about it! I’d be lying if I said my eye didn’t wander from time to time. But Liz, being the genius that she is has sprinkled a little aromatic magic on her iconic hot cloth cleanser to keep things fresh.... and fruity!

Just in case you don't know the deal with Cleanse & Polish™ Hot Cloth Cleanser -  a beauty icon of the highest order it's won over 100 beauty awards and one is sold every 23 seconds! It’s rich, yet gentle and delivers instantly visible results, and for a limited time is available in Jasmine & Osmanthus flavour.

This enchanting limited edition cleanser captures the precious beauty of opulent jasmine blossoms with the enveloping sweet floral softness of sun-warmed osmanthus petals. I don’t mind admitting I didn’t have a clue what osmanthus was, but the good people at Wikipedia inform me it’s a flowering plant native to Asia. It’s every bit as rich and creamy as the original Hot Cloth Cleanser, but with a sweet, summery  twist. The lush, yet delicate floral aromas are sweet and sensual. If you’re a C&P devotee, it makes a really nice change – tricking your senses into thinking you’re using a new cleanser, and it really is very fresh and summery.

The limited edition bottle comes in the larger 150ml size with a handy pump action - one pump does the whole face and comes with limited edition silver trimmed muslin cloths.

Cleanse & Polish™ Hot Cloth Cleanser Jasmine & Osmanthus Limited Edition £20.75 Available now direct at Liz Earle, available from John Lewis, Boots in July. 


Beauty Blight... When the products you love are discontinued

$
0
0

Proving all the money in the world can’t safeguard you from the ultimate beauty curse that is discontinued products. Even Kim K experienced the true grief of a make up junkie after her favourite foundation was discontinued. You may have seen in the press she tweeted Armani when she discovered her go-to Designer Shaping Cream Foundation had been given the chop, but committed the ultimate twitter faux pas misspelling GIORGIO’S first name – the response was hilarious – an offer of some foundation… with a side of shade.


It got me reminiscing about the beauties I’ve loved and lost over the years. My number one most loved, most missed (it’s been four years and it still hurts like hell) MAC Blushcremes. That soft, creamy tackiness was perfection in a pan! Amazingly pigmented, exquisitely bendable and the most long lasting of any cream blush I’ve known. The cool pink toned Ladyblush was my go-to for an unparalleled fresh, dewy, healthy glow (wearing in the picture above). I stockpiled as many as I could and still have a little of Lilicent (peachy pink) remaining, but between me and my Mum, the stocks soon dwindled. Damn you MAC, I’m still so annoyed by this… Cremeblend’s just don’t cut it!

Proof they’re serial offenders when it comes to the act of discontinuation… MAC Mineralize Satinfinish Foundation was a constant on my makeup menu for a long time. It always provided a coverage and glow I could rely on. I managed to track down a couple of bottles on eBay/Depop – I’ve still got a little NC25 and 30, and even though they’re probably too old to use, I guard them with my life!

Benefit Her Glossiness Lipgloss, I think the shade was They didn’t Hear it from Me (the one pictured above is Your people, My people). Cica 2006-2007 this was all I wore on my lips. How I loved that nudey pinky peachness! It went perfectly with my grey smokey eye (the only one I knew how to do back then) and it was the first gloss I came across that had that crème finish. Before that it was all that shiny, sticky, shimmery nonsense. Once that bit the dust, that was me done with lipgloss.

Researching discontinued beauty products I’ve just stumbled upon something shocking… Has Benefit Bella Bamba been discontinued? Please noooooooo! That’s a beautiful blush – see my review here. No need to hit the panic button just yet, between the box I have left and the Cheeky Sweet Spot Palette I picked up at Chrsitmas, I probably have enough supplies to last me a while, but when they’re gone, THEY’RE GONE!

So what have you loved and lost? If you could bring back one product, what would it be? 


YSL Touché Éclat Blur Perfector #nofilter

$
0
0

Yves Saint Laurent Touché Éclat Blur Perfector is exquisitely packaged. I mean, who wouldn’t want to “powder their nose” in public with this stunner. But is it as good as it looks?

Powder’s a thing of the past, or so they told me at YSL. Why apply lotions and potions to make the skin look pretty and glowy, only to dull and disguise it with a powder? I guess you’ve got a point. But am I ready to switch to these new powder/balm hybrids? I wasn’t sure….

Picture the scene, you’re at a YSL masterclass with renowned Make Up artist Frederic Letailleur. You’ve put in a little extra effort – classically chic no-make-up-make-up, flesh blow dry, manicured nails. You’re feeling pretty good about yourself until you catch your reflexion in the mirror. A combination of the bright (and unforgiving) lights of the make up hall and glass or two of prosecco, means you’re feeling the heat and the dreaded T-Zone shine was setting in. Just before I ran off scrambling for blotting powders, Fred suggested trying the Touché Éclat Blur Perfector. Using a foundation brush he lightly dabbed the product on my shiny spots, handed me the mirror and I was BLOWN AWAY. Shine be gone! I looked airbrushed… me, but through an Instagram filter. I had to buy it then and there!

So what is it? A multi-action invisible, weightless balm designed to mattify the skin, minimise pores and blur imperfections. Touché Éclat Blur Perfector £29.50 FeelUnique can be applied all over as a complexion perfector, as a finishing touch to complete your make-up routine, or as a perfecting and mattifying touch-up during the day. It comes with a sponge applicator and a handy velvet pouch.. more on this later.


As a setting product

Given the way Fred used it on me I’m thinking I can use this in place of my regular powder. I applied my usual base and instead of setting with a powder, I took the sponge and dabbed the balm around my T-zone. BIG MISTAKE! All this did was disturb my base and cause my foundation to slide and go patchy. I then consulted my blogging community – am I using it wrong? Turns out, this is actually a common side effect. Oh bugger, have I been duped?

As a primer

Turns out, this makes an amazing primer. The blurring properties of this balm are exceptional. Using a foundation brush, stroke on a light veil all over the face. It gives the most even, smooth canvas. Pores appear minimised and my skin feels like cashmere.  

For Touch ups

Primarily I wanted this for touch ups. A pretty little compact I could keep in my bag and use as my secret weapon to combat the shine. This super light-wright balm sweeps away the shininess without dulling skin, but application can be tricky. You know how it comes with a sponge applicator, well the sponge doesn’t fit into the compact. The two fit separately in the velvet pouch, but it’s not long before the sponge starts to get dusty/hair/full of bits! A few people suggested dabbing the product on with fingers… I’m fine with this but the warmth and oils in the fingers interfere with the product and further cause slide and disruption. In my opinion this product is best applied with a traditional foundation brush. But it’s hardly a handy touch up compact if you’ve got to start carting around a foundation brush!


I am a little disappointed with Touché Éclat Blur Perfector. It’s not quite the revolutionary product I was expecting. Its blurring properties are stronger than its blotting power and application is confusing but I think YSL are on to something. A few tweaks here and a change to the packaging/applicator there and I could love this. Powder, you’re safe for now..

Who’s tried this? Do you love it or loathe it? 


BEAUTY GIVEAWAY: MAC LIPSTICK OR EYESHADOW OF YOUR CHOICE

$
0
0

I woke up this morning feeling generous... isn't it about time I did another giveaway?

Fancy bagging a free MAC Lipstick OR Eyeshadow? Yep, absolutely any lipstick or eyeshadow from the permanent line and it’s as easy as peas to enter. All you have to do is pick the shade and follow me... simples!

1.    Leave a blog post comment telling me your favourite MAC lipstick or eyeshadow (if you have one) and which one you’d like to win in the giveaway (they don’t have to be the same and you can change your mind if you win).
2.    Follow me through Google Friends Connect AND Twitter (links on the right).

3.    OPTIONAL: You can earn extra entries if you follow me on Bloglovin, Instagram, Pinterest etc.

The giveaway is open internationally, for new and existing followers and ends at midnight on Sunday 19th July 2015. You know the drill; entries received after this point, will not count, but may still be charged.

Thanks for following me and good luck!


MAC Faux Lipstick... Don't Tell the Others, but you're my Favourite!

$
0
0

I probably say this (I definitely think it) every time I buy a new lipstick, but you're my favourite!

I absolutely adore this colour. I feel like it's the one I've been looking for... without even knowing it. I have a terrible habit of going to the MAC counter and being drawn to the lipsticks I already have.  Angel and Creme Cup are two of my all time favourites, but lately I've been craving something slightly darker, less pale pink and more, (I cringe at myself for saying this)... Kylie Jenner-ish!

MAC Faux (Satin) £15.50 here is a neutral medium pink with a hint of mauve - I feel like it's a darker, non-frosty version of Angel. Similar to syrup but less plummy. It sits in the same family as Brave, Twig, Mehr, but lighter and a little less brown.


The Satin lipstick has a creamy demi-matte texture, it glides on easily and lasts for absolutely AGES! You know me, I love a cremesheen, but they have to be touched up every five minutes. Satin's go on and stay on. Super pigmented and completely opaque - the colour you see in the bullet it the colour you get on your lips. I love it so much I used it for my sisters prom make up... the perfect compliment to a dramatic smokey eye.

Fancy trying Faux, or any other MAC Lipstick? Don't forget to enter my giveaway - Win ANY MAC Lipstick or Eyeshadow


Giorgio Armani Maestro Bronzer… Next Level Bronzing

$
0
0


Cheat that post-holiday glow with the most radiant, skin-kissed bronzer ever.


Last year, Giorgio Armani (Kim, that’s GI-orgio) launched the limited edition Maestro Bronzer Liquid Summer N°100. It went down an absolute storm, so much so, it’s back, with a lighter and darker sister, and this time around, it’s permanent.

I came across this earlier in the year at a Giorgio Armani masterclass. I’ll admit, I was a little dubious when I looked at the bottle, it airs on the Tan-tasic side and I wasn’t after the Donetella look, but as soon as it touched my skin I was SOLD. In just seconds I had that much coveted post-holiday glow.

Maestro Liquid Summer is infused with golden micro-pearls that leave a veil of sunlight. Now available in three shades N°90, N°100 and N°110, I was matched to the middle shade. It’s a warm, golden-hued brown with a very fine golden shimmer. Although it looks very dark in the bottle, it does sheer out on application.

It’s my first liquid bronzer and I am surprised by how easy it is to apply. It can be dabbed on the high planes and contours and blended for a naturally bronzed look or added to a moisturiser or foundation for all-over kiss of colour. Personally I prefer applying it to the contours with Real Techniques Sculpting Brush. Give the bottle a good old shake, dispense 1 or 2 drops on the back of your hand, dab in the brush and sweep along the jawline, cheekbones, temples, hairline etc. Then using the same brush, buff and blend to sheer out the product. At the Armani counter they applied it with a flat-edged foundation brush so it’s pretty versatile. I haven’t tried it yet but I’d imagine a beauty blender would also work well. The practically weightless fluid boosts the natural tones in your skin to make you feel all golden-goddess-y. It’s sublimely bendable, it practically melts into your skin, leaving behind absolutely NO harsh tan lines. One application is enough for me, but you can seamlessly build it up to your desired depth. There’s a noticeable shimmer in the bottle but on the face this translates to a beautiful, healthy sheen.


Let’s talk price, Giorgio Armani doesn’t do budget. At £39.50 (Debenhams - here) it’s at the top price point, but I honestly think it’s a real wonder product and I don’t regret a single pound. One bottle contains a whole vat of bronzer.. I’m not sure if I’ll ever get to the bottom of it… but I’ll look beautifully bronzed trying.

What's your favourite bronzer?


Worth the Hype? St.Tropez In Shower Tanning Lotion

$
0
0

Whilst the beauty World went into over drive buzzing about the new St Tropez Gradual in shower tanning lotion £14.50, I deliberately stood back and decided I’d let the others do the testing and the reviews do the talking. Problem is, there’s been no general consensus! We’re not raving or hating! But the curiosity was killing me and just as I was about to buy a bottle, inStyle Magazine came out with a freebie on the cover!!!  

With a wedding on the horizon I decided to slap it straight on. If I was quick there was time for three applications – I’d heard it was a slow burner/tanner. And to really see the difference it made, I decided to tan one arm and leave the other – the things I do for you!

How to use…

By now, you know the script. Shower as normal, do what you gotta do and rinse off your suds. Turn the shower off and apply the St Tropez lotion all over your damp body. Wait three minutes. Stick the shower back on. Rinse off. Pat dry. Easy peasy!

This is an application I can get on board with. Okay standing in the shower for three minutes ringing wet isn’t my favourite past time, but it’s a hella lot quicker and less of a faff-on than covering your body in a tar-like product and waiting all day for it to take effect. There was no tell-tail biscuit/chicken skin scent and no brown stains on the bed sheets. So far, so good.

The Results….

Looking at the picture above, could you guess which arm has been St Tropez’d? The difference AFTER THREE APPLICATIONS is pretty negligible, if anything the arm I didn’t tan actually looks darker! I’m not suggesting St Tropez in shower tanning lotion actually lightens your skin – that would be outrageous, but on my arms it’s had zero tanning effect. After the third application I started to see a tiny bit more colour on my legs, which haven’t seen much natural sun this year, but also a little build up on my knees.


No danger of me sitting on the fence - St Tropez in shower lotion, in my experience is a major fail. I stood cold and wet in the shower for a combined 9 minutes and came out lighter than I went in… except on my knees. If you’re really fair or incredibly patient, I think this could be worth a try. For me, I’m just pleased I got to test it before buying a full bottle.

If I haven’t completely put you off, Grab a free sample of St Tropez In Shower Tanning Lotion with August’s InStyle Magazine… out now! 


The Prom Make Up

$
0
0

Prom. When did they become so BIG?! When I was at school it was a disco, black dress from Topshop, a slick of lipgloss and the job was done. These days it's like the flipping Oscars and only full on glamour will do. Last week it was my sisters "Big Day" and luckily for her she didn't have to look far for a make up artist. I shared some pics on Instagram last week and got lots of requests to share the products I used. So here goes it....


Eyes

Georgia has amazing, almond shaped eyes with a generous lid area so there was plenty to play with. She wanted a dark, dramatic eye and that's what she got!

MAC Paint Pot Soft Ocre - £16 here
Eyeko Fat Eye Stick in Smoke, up to and just passed the crease
Urban Decay Naked Palette - Half Baked pressed into the lids, smog on the outer part
The Balm NudeTude Palette - Sassy and Snobby inner highlight | Sophisticate, Sleek & Serious to build up the outer crease
Bella Pierre Shimmer Stack (copper shade) pressed wet (MAC Fix +) into the middle of lids
Bobbi Brown Gel Liner Black Ink - £17 here
Benefit Roller Lash Mascara - £19 here
Elf Lashes


Brows

Gerogia's like me, she won't let anyone else do her brows so I can take no credit for her arches.

HD Brow Palette - £25 here
Liz Earle Brow and Eye Brush - £12.50 here
Anastasia Beverly hills Clear Brow Gel - £16.50 here

Face

Benefit PoreFessional Primer - £24.50 here
bareMinerals bareskin foundation bare porcelain £20.80 here
bareMinerals Stroke of Light Eye Brightener Luminous 1 £22 here
bareMinerals Mineral Veil £16 here
Benefit Hoola Bronzing Powder on the contours - £23.50 here
MAC Desert Rose Blush
Laura Mercier Matte Radiance Baked Powder - £25 here

Lips

Those LIPS! Man I missed out in the lip stakes! That amazing cupids bow needs no accentuation!

l'Oreal Infallible Lip Liner Always Toasted - £5.10 here
MAC Lipstick Faux - £15.50 here


I may be slightly bias, but she looked HAWT! 


Benefit They're Real! in Sexy Killer Colours

$
0
0
They're Real Mascara Beyond Brown with Push Up Liner Beyond Blue

As a They’re Real FAN-atic, news that they were launching the best-selling-award-winning mascara and slightly lesser loved but equally talked about Push-Up Liner in new killer colours evoked a big whoop, whoop from me. Here’s the deal…

They’re Real Mascara is now available in Beyond Black, Beyond Blue and Beyond Brown. They’re real! push-up eyeliner now comes in five rocking shades - Beyond Black, Blue, Brown, Purple and Green.

They’re Real Mascara - Beyond Brown* £19.50 here


There’s a reason They’re Real is the UK's No.1 best-selling mascara… it’s simply ah-mazing! Va, va,VOOM lashes every time! I wear this and people ask if I’m wearing falsies (full review here). Which is great, BUT there are days when I want to look less done, i.e work days. Could Beyond Brown be the answer? Forget what you think you know about brown mascara. It’s not dull and it’s not just for the over 60s. This isn’t any brown, it’s Beyond Brown! It’s a really striking, rich, milk chocolate brown and unlike other brown mascaras, that basically just look like a soft black, this one goes on brown and stays brown. For me this is a great every day mascara – the same kick-ass volume and curves, but with a softer, more wearable edge.

They’re real! push-up eyeliner Beyond Blue* £18.50 here


I can’t remember a beauty product generating as much pre-sale buzz and anticipation as Benefit’s gel-pen-liner. However it turned out the nifty little liner wasn’t so, er, nifty. Mixed reviews and a shaky test at the Benefit counter put me off this the first time around. But I’ve surprised myself with how easily I’ve got the hang of it. I can’t lie – my first attempt was a disaster. I removed the orange stopper, twisted the pen until the product appeared, wiped off the excess, and proceeded to draw a squiggly line half way up my lid, which I then tried to fix by making it thicker, and THICKER – we’ve all been there! Don’t apply this like a normal liner, it’s NOT a normal liner. I watched this video and hey presto, my second attempt was spot on. It’s actually pretty easy to use once you get the hang of it. Don’t attempt to do one perfect, straight line. I did the outer half, then the inner half. I love how the AccuFlex tip hugs the lash line allowing you to get right to the root. It dries quick so no time to hang around and it lasts all day, and night! Let’s talk colour. I actually love blue eye liner… this isn’t my first. For some it may still conjure up thoughts of the 80s, to that I say Get.Over.It! Blue liner has moved on. It’s actually a great eye brightener and gives a more wide awake look. Beyond Blue is a sexy midnight blue, bordering on navy, making it subtle, totally wearable and very pretty. In the pictures above I’m wearing a thin, everyday line, but you can go as thick as you like or up the impact with pretty blue cat flicks.

I'm embracing the colour. Are you? 


Nude Palette with Serious ATTI'tude

$
0
0

Step aside naked palette, there's a new dude in town. Okay, technically not new (I think this has been kicking around for a few years in the US) but the San Fran based brand is much lesser known here in the UK and it's only recently that it's crept its way across the pond. The Balm Cosmetics has attitude – it’s fun, sassy and classy, and if the nude tude palette is anything to go by… qual-a-taaay!

The 12 shades are a great mixture of warm and neutral tones. There’s quite a lot of frost/shimmers, which I love and a few sexy satin and mattes.

Sassy is a frosted white with great colour payoff and a buttery, smooth texture. A great base or brow bone highlight.
Snobby is a shimmery gold/yellow. It doesn’t show up great in the photos because it’s similar to my skin tone, but it makes a great inner eye highlight.
Stubborn is a light-medium peach pink with a soft frost finish.
Stand-offish is a pinky bronze shimmer with a frost-metallic finish. It’s smooth with a decent colour payoff. Reminds me of X in the Naked paltette
Selfish is a frosted taupe – I love this one. Reminds me a little of MAC Satin Taupe, but lighter. Great pigmentation and buttery soft.
Sultry is a warmed-up, medium brown with a satin finish. It has a very soft texture and is super easy to blend. A great one-wash shade, similar to MAC Soba.
Sophisticated is a dark, cool toned brown with a very subtle bronze shimmer.
Schitzo is a warm, golden bronze-brown with a soft, satin/frost finish. Anpther of my favourites, it’s great for a bronze smokey eye and has incredibly pigmentation.
Sexy is rich burgundy with hints of red and brown with a sexy matte finish.
Silly is a red-tinted brown with flecks of copper sparkle. It’s a beautiful shade but it doesn’t have the best colour payoff – fairly soft and sheer.
Serious is a medium-dark black with a matte finish. A great smudge out shade – pigmentation is fantastic and being a matte it’s incredibly long lasting. I smudge this one along my lash lines.
Sleek is a dark black-brown with a matte finish. It’s less dramatic, warmer than Serious, but with the same amazing colour pay off.


I’ve been using this palette for months and only just realised all the shades start  with “S”. Any significance? Who knows? What I do know is this palette is fantastic. The powders are satiny smooth, have amazing pigmentation and blend incredibly. For a so-called “nude” palette there’s actually quite a lot of colour in there, it’s not just 12 variations of brown. My personal faves are Selfish, Sophisticated and Seductive, the only disappointing shade - Silly - poor pigmentation. The packaging is cute and sassy – sexy ladies, their modesty protected by the shadows. I generally prefer hard case shells – easier to clean and stack, but the cardboard outer is slim and light-weight, and still includes a mirror.

A comparison to Urban Decay’s Naked palette is natural – they both have a nude/naked theme and they’re both palettes, but there’s actually not much overlap when it comes to shades. They’re similar, but not too similar that you can’t have both. I actually find the two work really well together.

The Nude Tude Palette retails for £30, Feel Unique and Superdrug, but I actually found it on Amazon for £19.75. At either price point it’s well worth it and now I'm being greedy and want to try Nude Dude - like i need another eyeshadow palette! 


What's your favourite shade? 


FOTD - The Wedding Guest Make Up

$
0
0

Sorry about the rollers - note to self, take pictures post-hair.

It’s been a while since I shared a face of the day. Truth is, I haven’t been rocking too many share-worthy faces lately... Too busy beautifying other people to bother with myself. What better excuse to spruce up than a wedding! A couple of weeks ago I went to a lovely wedding on one of the HOTtest days of the year. There was some serious melting happening whilst I was getting ready so I decided to keep it a fairly low-key – Glam but not too OTT. Bronzey, glowy, a strong, but not-too-heavy eye and a simple, low maintenance lip and the whole thing had to last all day and withstand the heat.

Product roll please….


Base

Had to start with Benefit poreFessional Primer. A great primer when there’s heat/humidity in the mix. As well as providing a smooth base it also has a mattifying/anti-shine effect.

I cracked out one of my all time faves, but recently cast aside (in place of bareMinerals complexion rescue) Chanel Vitalumiere Foundation shade 30. Yes it’s a glowy foundation, but it doesn’t oxidise or cause a dreaded shine after a few hours.

I used Armani Maestro liquid bronzer, partly because it’s the dogs cahoonas (review here) but also I wanted to avoid too many layers of powder. I’m obsessed with this stuff, it gives the most radiant bronzy glow.

I’m not always powders biggest fan but if you want you make up to last all day, especially in the heat, you’ve got to dust on the dry stuff. I used a mixture of MAC Mineralise Skinfinish Natural Medium Plus and bareMinerals Mineral Veil Original– why? Well I’m greedy, I love them both and I can’t decide which is best. I did a light dusting of Mineral Veil followed by a dab of Skinfinish Natural around my nose and forehead – aka the worst offenders.

I added a little flush of colour to the cheeks with MAC Desert Rose Blush and a subtle highlight with Laura Mercier Radiance Matte Highlighting Powder. If ever there was a day to crack this baby out, that was it! I was already a tad too sheeny, but I wouldn’t feel done without a teeny tiny bit of highlight on the high points – this one adds the highlight without the shine.

Eyes

Double trouble on the eye base - Urban Decay Primer Potion AND MAC Pro Longwear Paint Pot Soft Ochre. Shadow – you’re going nowhere!

For shadow I used a mixture of my love-you-long-time Naked palette and new love, NUDE’tude palette. Laid down the crease with Naked and Buck from the Naked Palette and deepened the outer half with Seductive and Sultry from NUDE’tude. From that palette I added a little extra depth and lower lash liner smoke with Sophisted and finished with Snobby for an inner highlight.

Bobbi Brown Gel Liner– there was no other choice, heat or not! If you want bullet-proof staying power, this is where you go! Chanel le Volume de Chanel Mascara– I toyed with going waterproof but this is my favourite special occasion mascara plus it doesn’t smudge and I didn’t cry.


Brows

Standard brow routine - HD Brow Palette applied with my trusted Liz Earle Eye & Brow Brush and set with Anastasia Beverly Hills Clear Brow Gel.

Lips

Dead simple – I lined and filled the entire lip area with MAC Lip Pencil in Naked for a long-lasting, budge-proof base and dabbed over a little YSL Rouge Volupte Lipstick Peach Passion for a soft pop of peachiness.

The make up did a pretty good job of going the distance and by 5pm my face didn’t resemble an oil slick, although once the jägers came out…. you know the rest. I did however manage to snap a dodgy bathroom selfie a few hours in...


What are your occasion make up go-tos?


Cheat Your Way to the Perfect Pout

$
0
0

Charlotte Tilbury - You vixen! Just when I thought I had my beauty splurge urges under control along you came with your miracle this, magic that and irresistible gold packaging. But resist I have… until now! And all you bought was a lip liner? This ain’t any lip liner. This is the most raved about lip liner of all time, heralded as one of Charlotte’s wonder products Lip Cheat in Pillow Talk £16 is the ultimate lip enhancer.

Are words even needed? Look at the difference it's made to the size and shape of my lips! Plump, voluptuous, sexy lips with zero effort. Creamier than your average lip pencil, it glides on effortlessly with absolutely no dragging or need to press down hard. In Pillow Talk she’s perfectly captured that my lips but better shade. A light-medium neutral pink with a touch of brown, it's a fantastically universal shade that will go with most lip colours... but c'mon, does it even need a lipstick? This one holds its own! My lips, like most, are faded around the outer edges, Lip Cheat fills in the gaps and creates the illusion of fuller-fatter-va va voom lips. The best thing is, it's a totally non-drying velvety formula. Full-on staying power without drying, feathering or fading. Case in point - the swatch I did on my arm stayed put for 20 hours. Okay your arm doesn't eat, drink and talk shi*e but wear time on my lips is an equally impressive 4-5 hours! I'm almost disappointed I don't need to touch up!

I'm not normally a lip liner gal but seeing the difference this makes I'd be mad to skip it. My lips definitely look more naturally full. I knew once I’d popped my Charlotte Tilbury cherry I’d be wanting more… and I do. It helps that she hasn’t made it this far North yet, but I’m saving myself for a big blow out when she does (Fenwick Newcastle… hurry it up).  

What's your favourite Charlotte Tilbury product?


A Small but oh-so-Mighty US Beauty Haul

$
0
0

Most girls might be tad disappointed when your fiancee comes home and tells you he’s heading to New York… without you. Me, I reach for the nearest pad and start making a list!

Before I share, can I just say NUMBER ONE on the list was the Lorac Pro Palette.I believe my words were “don’t come back without the Lorac Palette”. Guess what, he came back, a Lorac palette did not (insert angry face). Not for lack of trying (or so he tells me) but nowhere in Manhattan appear to sell Lorac?!?! Sephora, MACY’s, Barney’s, CVS – no, no, no and no. I sent him searching for Nordstrom but it was a sale store with no beauty. The nearest Ultra was in Glendale. US ladies, help me out here, what’s up with that?

Lorac rant aside he did come back with some lovely treats….

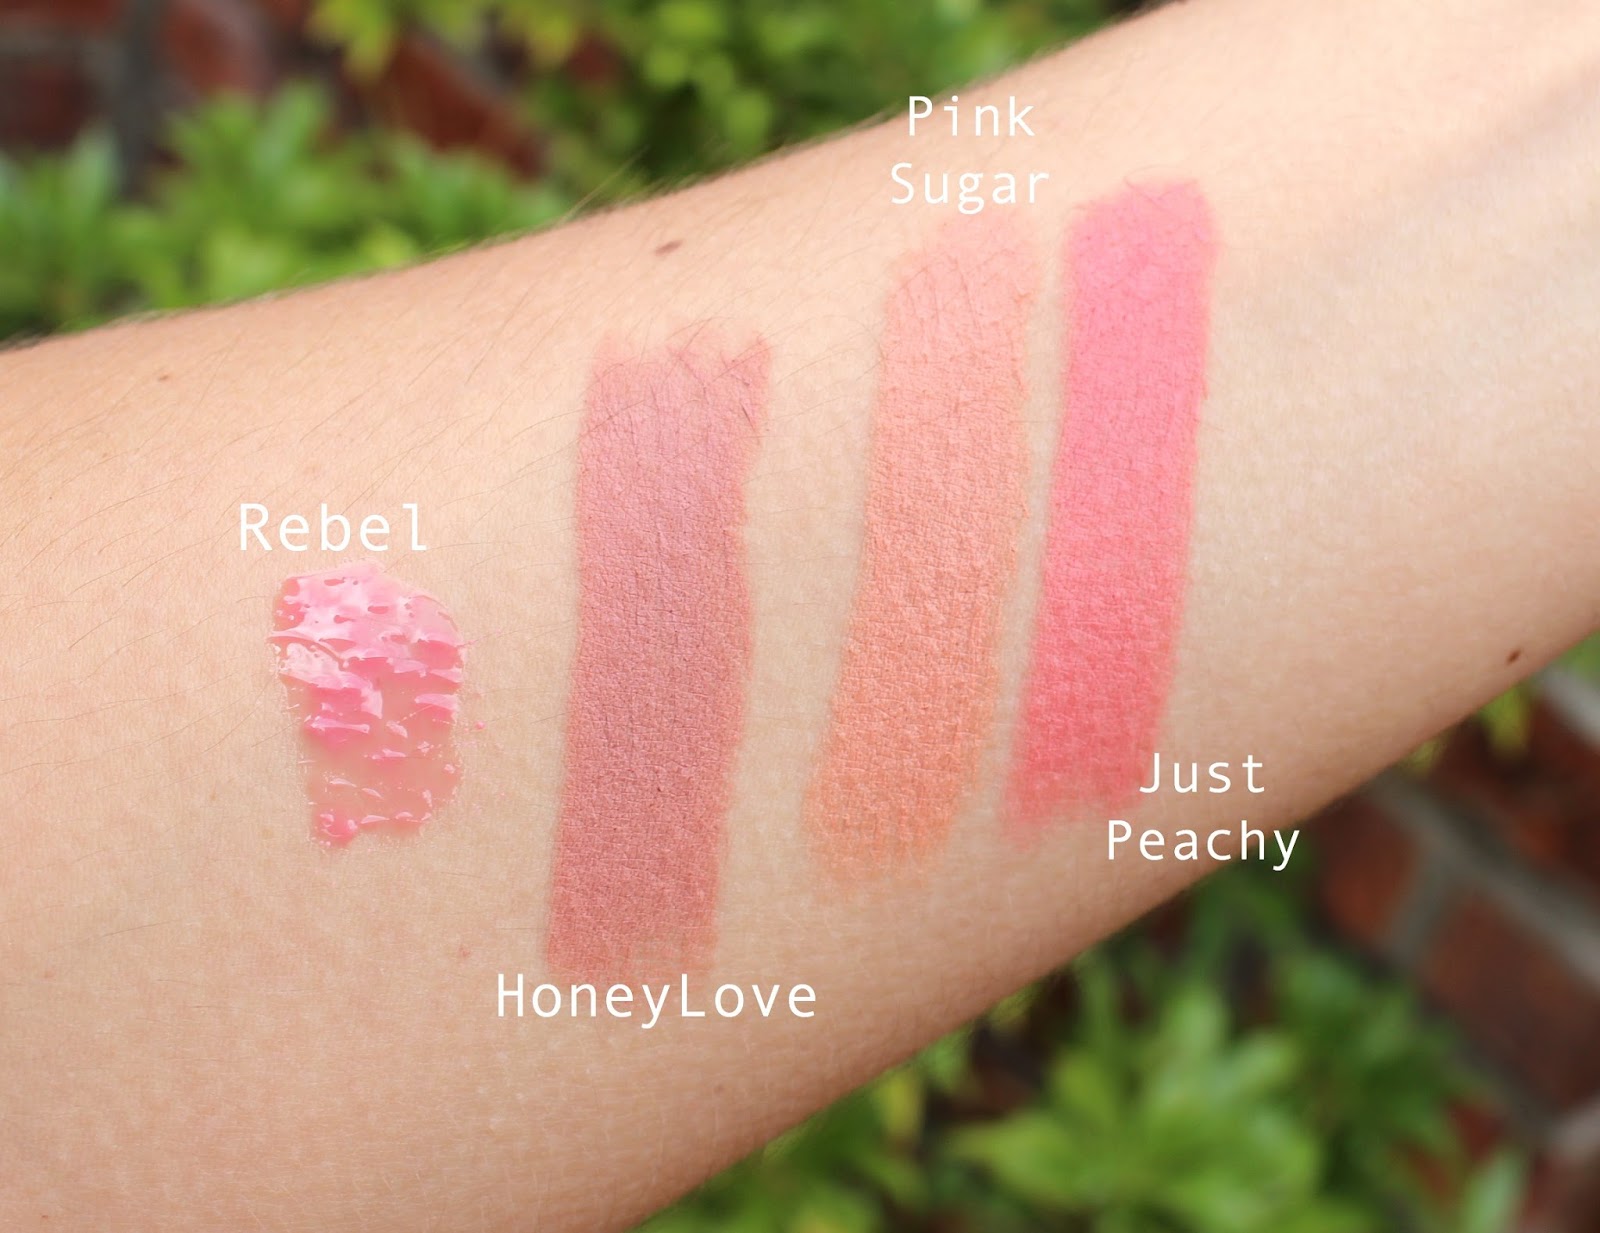
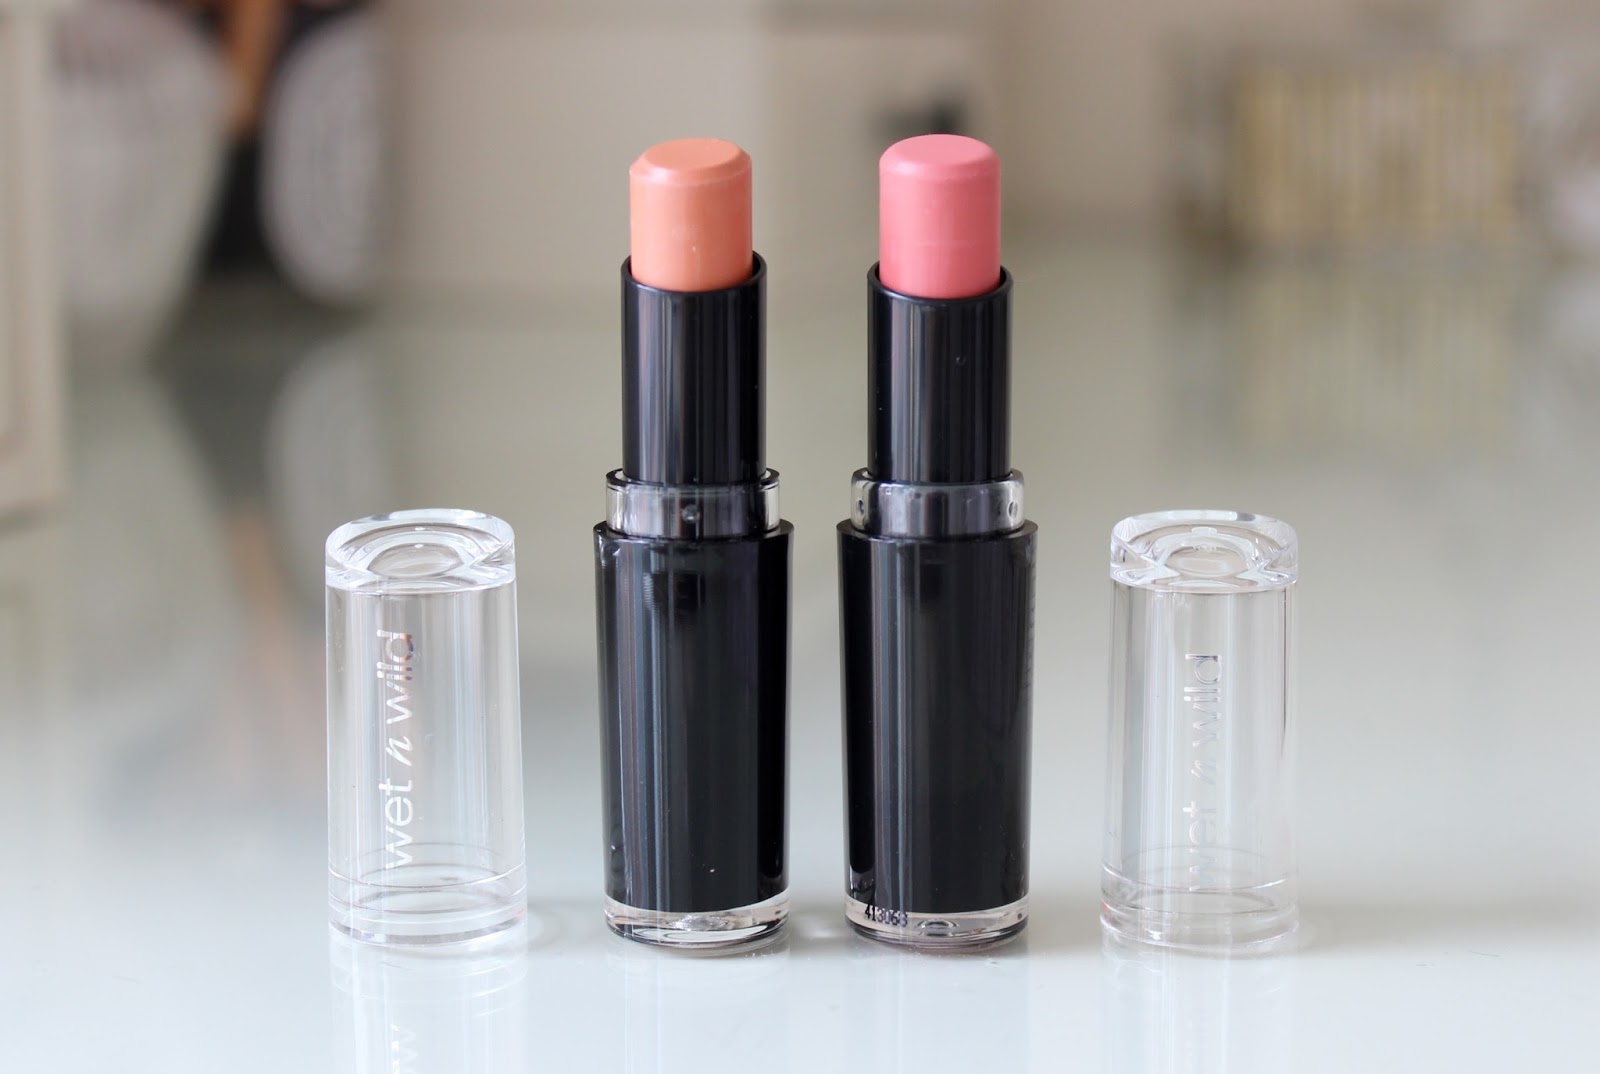
Wet n Wild Mega Last Lipsticks – Just peachy and Pink sugar $1.99 each 

If you’re heading to the US I can STRONGLY recommend picking up a Wet n Wild Lipsticks or two! I absolutely adore them and cannot believe they cost just a couple of dollars! If I lived in the US I doubt I’d need to buy another other lipstick brand. The pigmentation, the texture, the staying power – all phenomenal. I’m building up quite the collection of Wet n Wild Lipsticks – I can feel another post brewing. Just Peachy is a gorgeous peachy pink. Pink Sugar, despite the name, I’d describe as more of a peachy nude with a tiny hint of pink. You can pick up some shades in Amazon - they're still cheap, but they’re not as cheap.


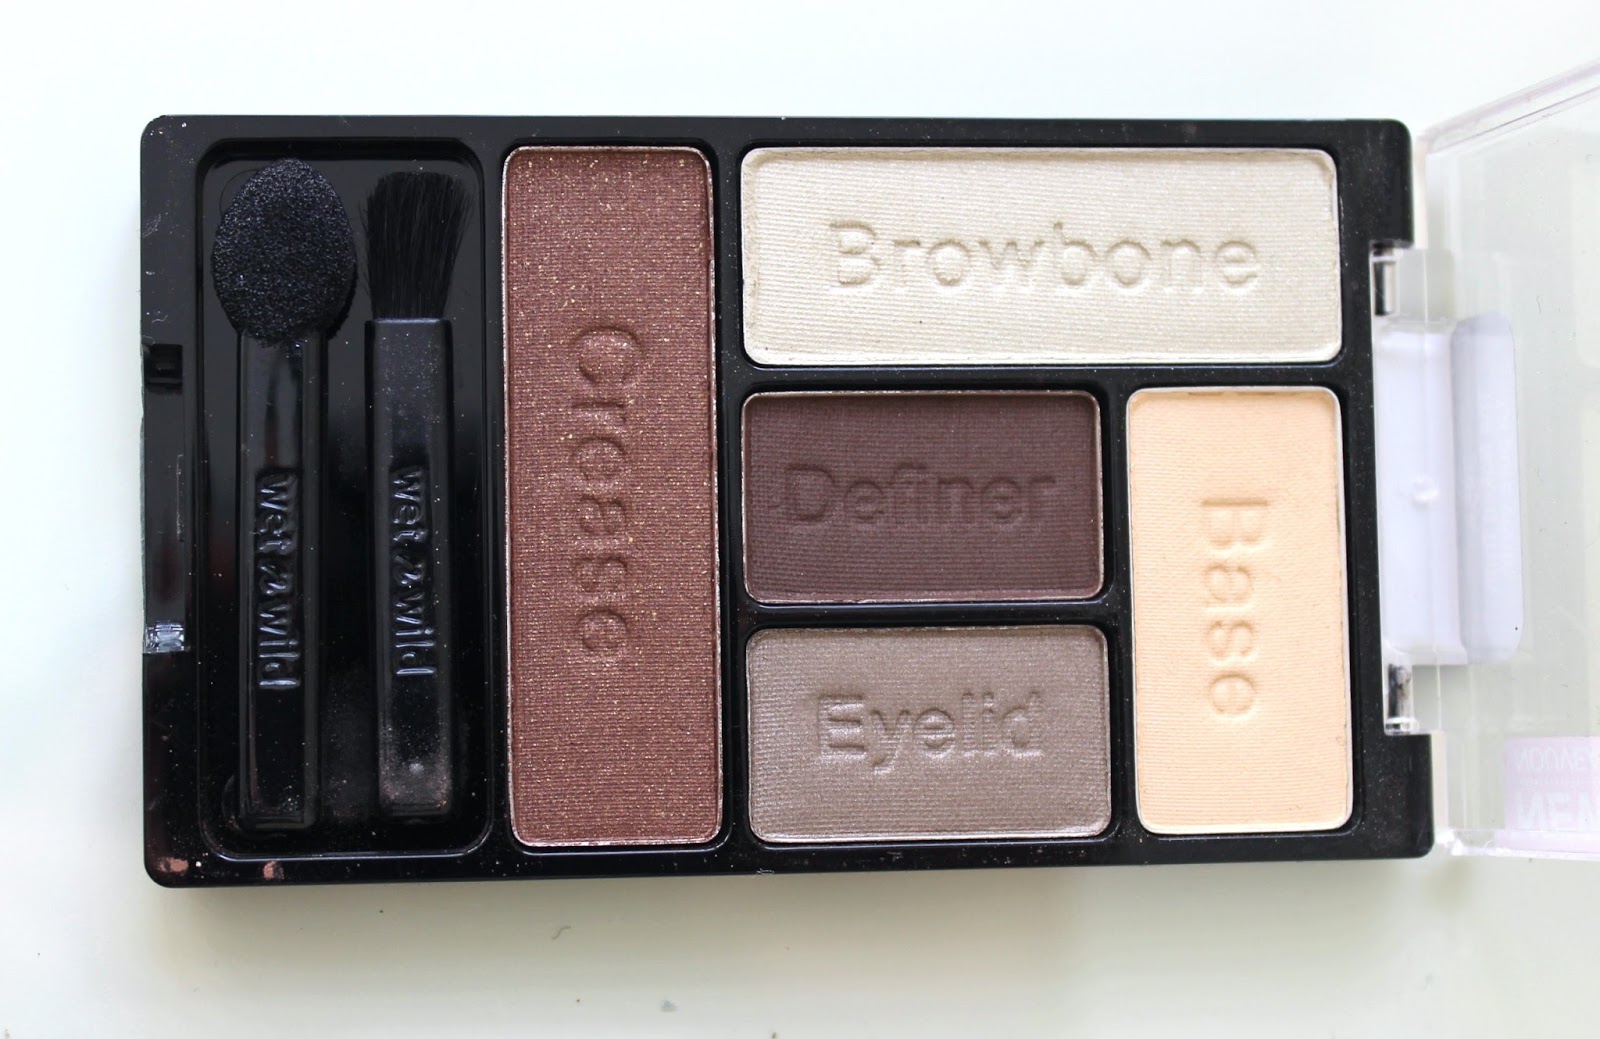
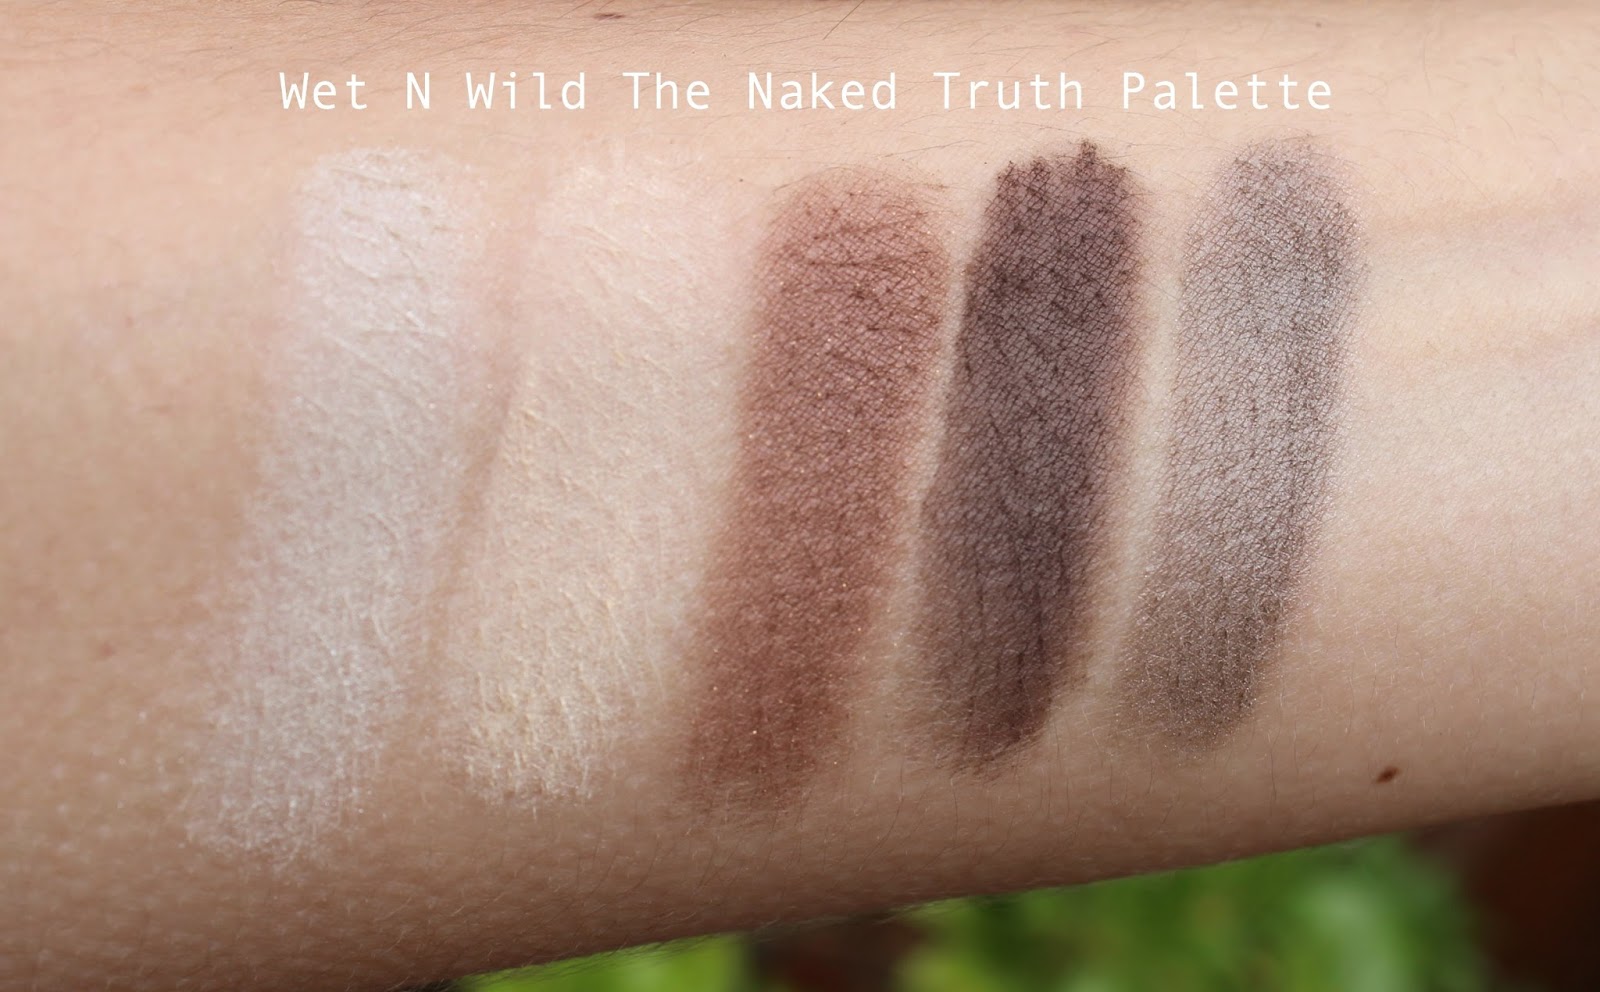
Wet 'n Wild Eyeshadow Palette The Naked Truth $3.99

That’s a hella lotta eyeshadow for a couple of quid! A mixture of mattes, shimmers and satins, it’s the perfect neutral everyday palette. Just like the lipsticks the pigmentation, texture and staying power are fab – check out the swatches.


bareMinerals Marvelous Moxie Lipgloss Rebel $18

Sure you can get bareMinerals over here but it’s a fair bit cheaper across the pond. This was used on me at a bareMinerals masterclass and I luuuurved it - despite not being much of a lip gloss gal these days. But at the time I really couldn’t justify ANOTHER lip product (see, I can exercise SOME restraint). It’s a gorgeous rosey pink that give the lips a sexy luscious finish. There’s more than enough pigmentation to wear alone, it has a delicate minty scent and boy does it last.

Sephora collection Master Cleanse: Daily Brush Cleaner $8.50

A non-alcoholic solution to keep brushes clean and sanitized. A great piece for popping in my kit for on the spot cleaning.

Sephora collection Disposable Mascara Wands $7

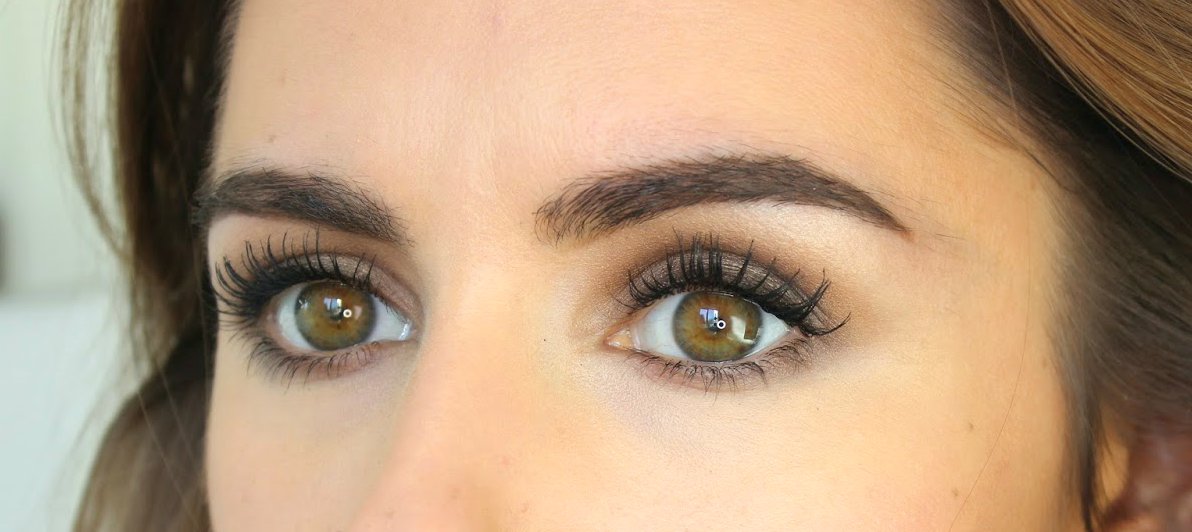
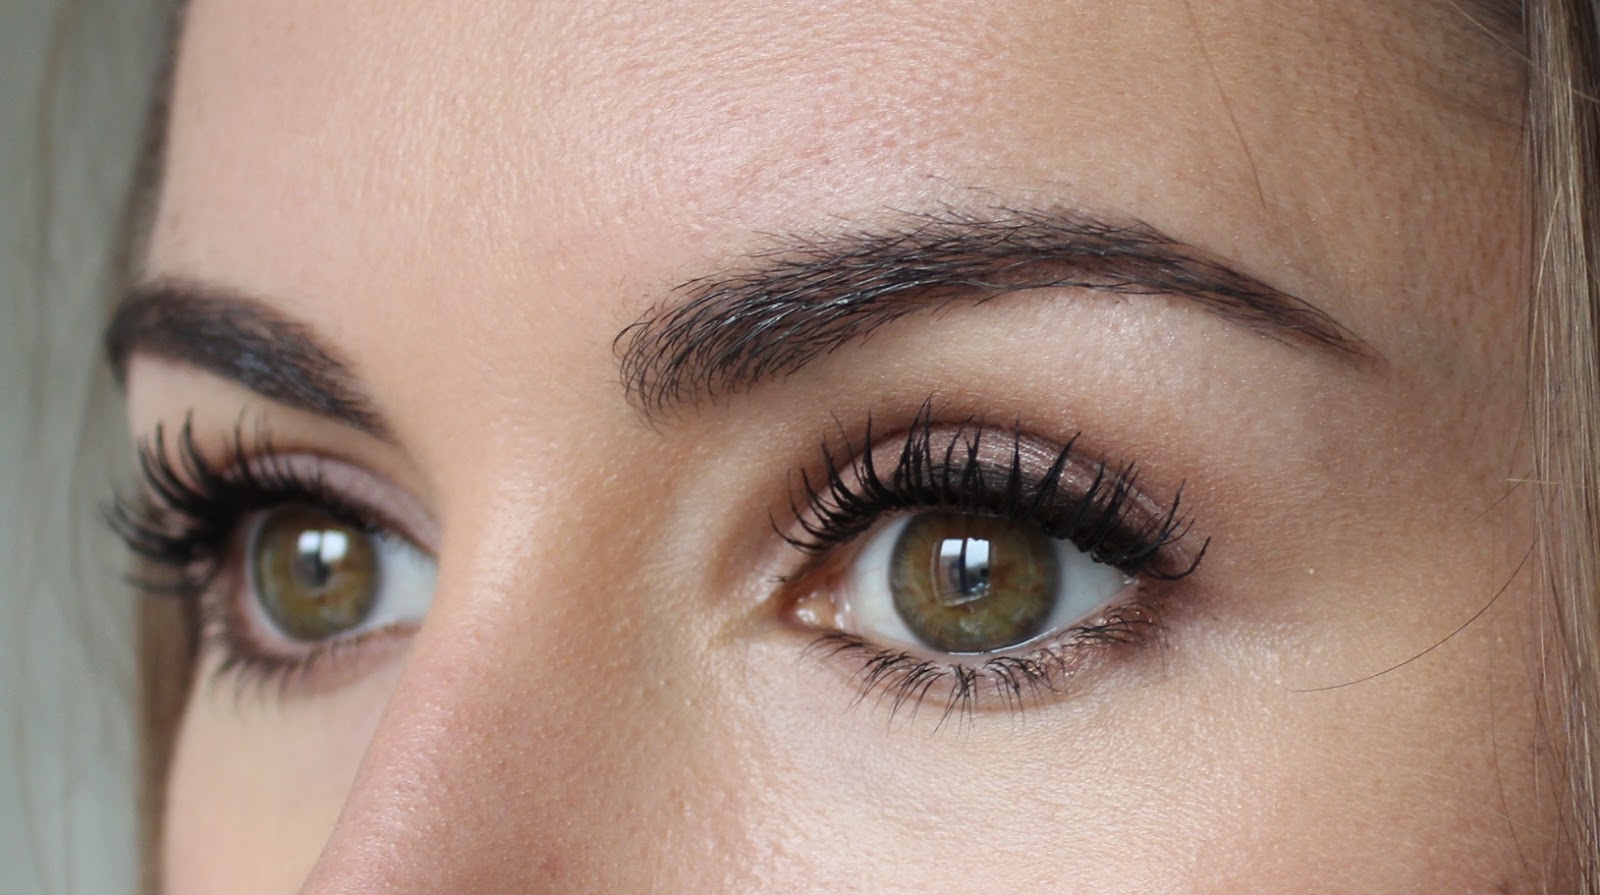
Disposable Mascara Wands are an MUA must-have! It’s a cardinal sin to share mascara wands, but as we know much of the magic in a mascara lies in a wand. Generic disposable mascara wands are basically brow spooly’s, for me they don’t cut the mustard. Although these silicone ones are much more expensive, the results are MUCH better.

MAC 213 Fluff Brush $24

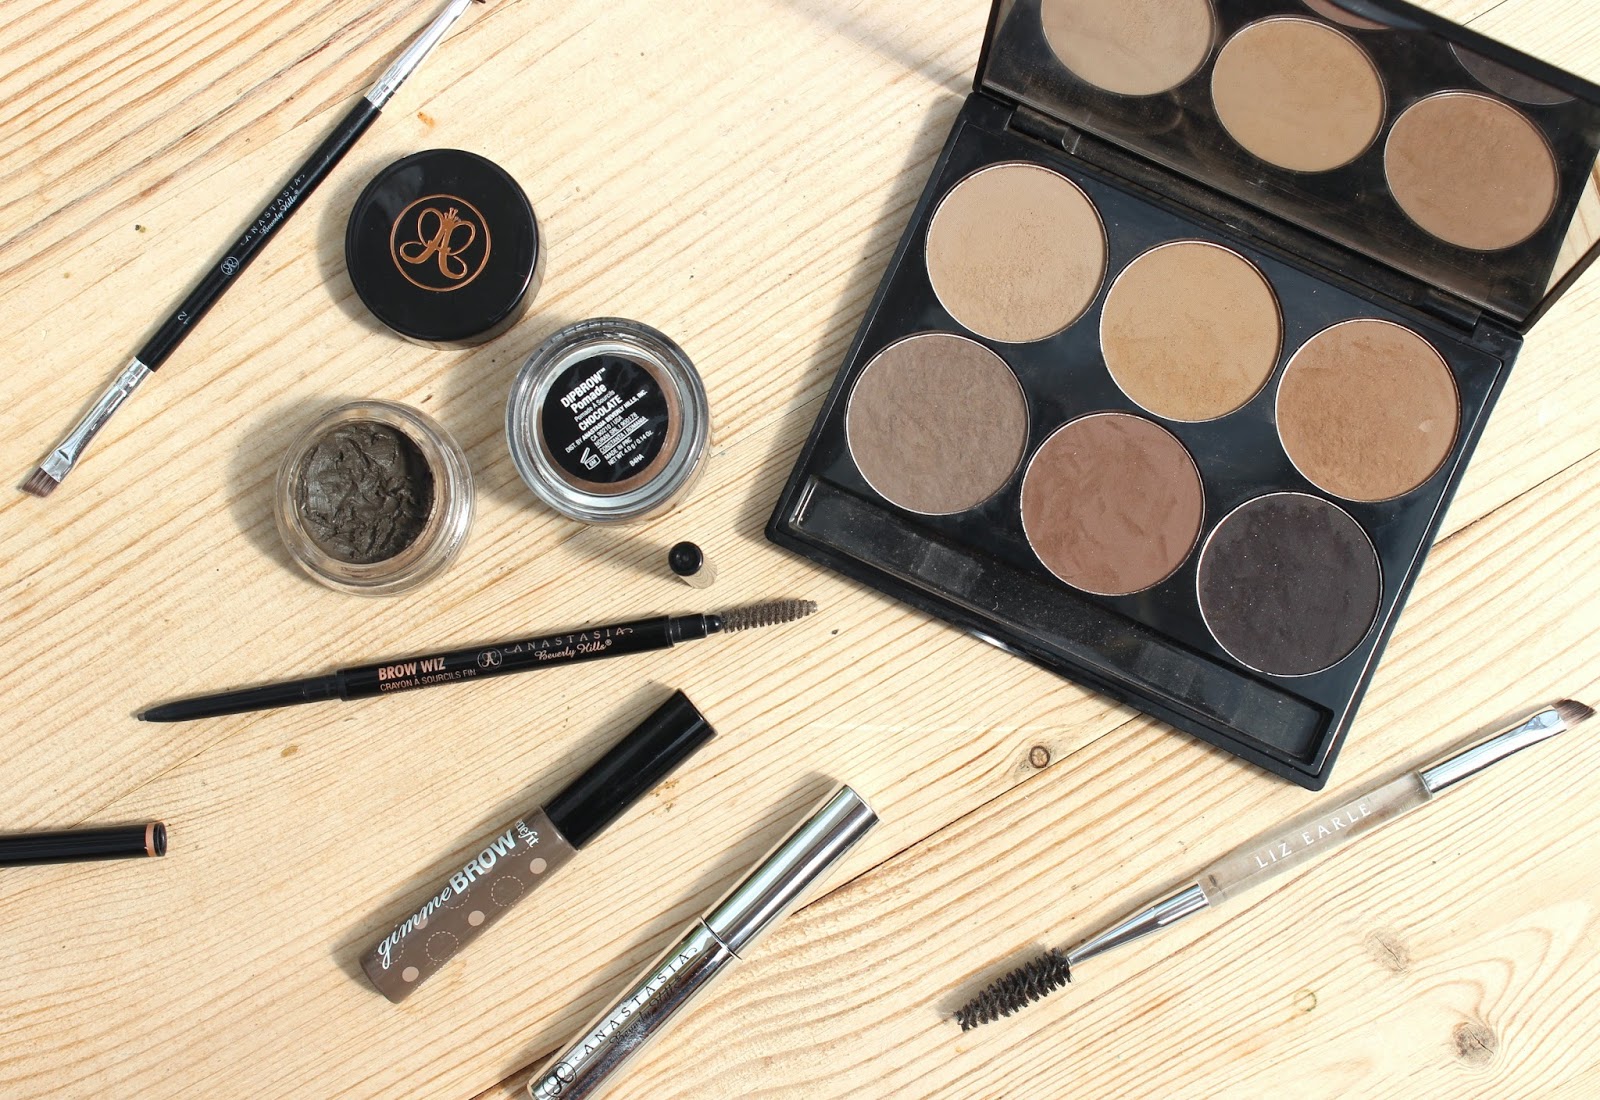
You know how much I love my 217, but sometimes you need something smaller that can navigate the eye with more precision. Step forward the 213 – a small, dense, dome shaped brush, ideal for shadow application and shading. Contrary to the name it’s not actually that fluffy. The bristles are soft, but I wouldn’t call it a blending brush persay. It works brilliantly alongside the 217. The 213 lays down the product, the 217 does the blending – I dare say you could create any look with these two in your arsenal.

MAC Lipstick Honeylove $16

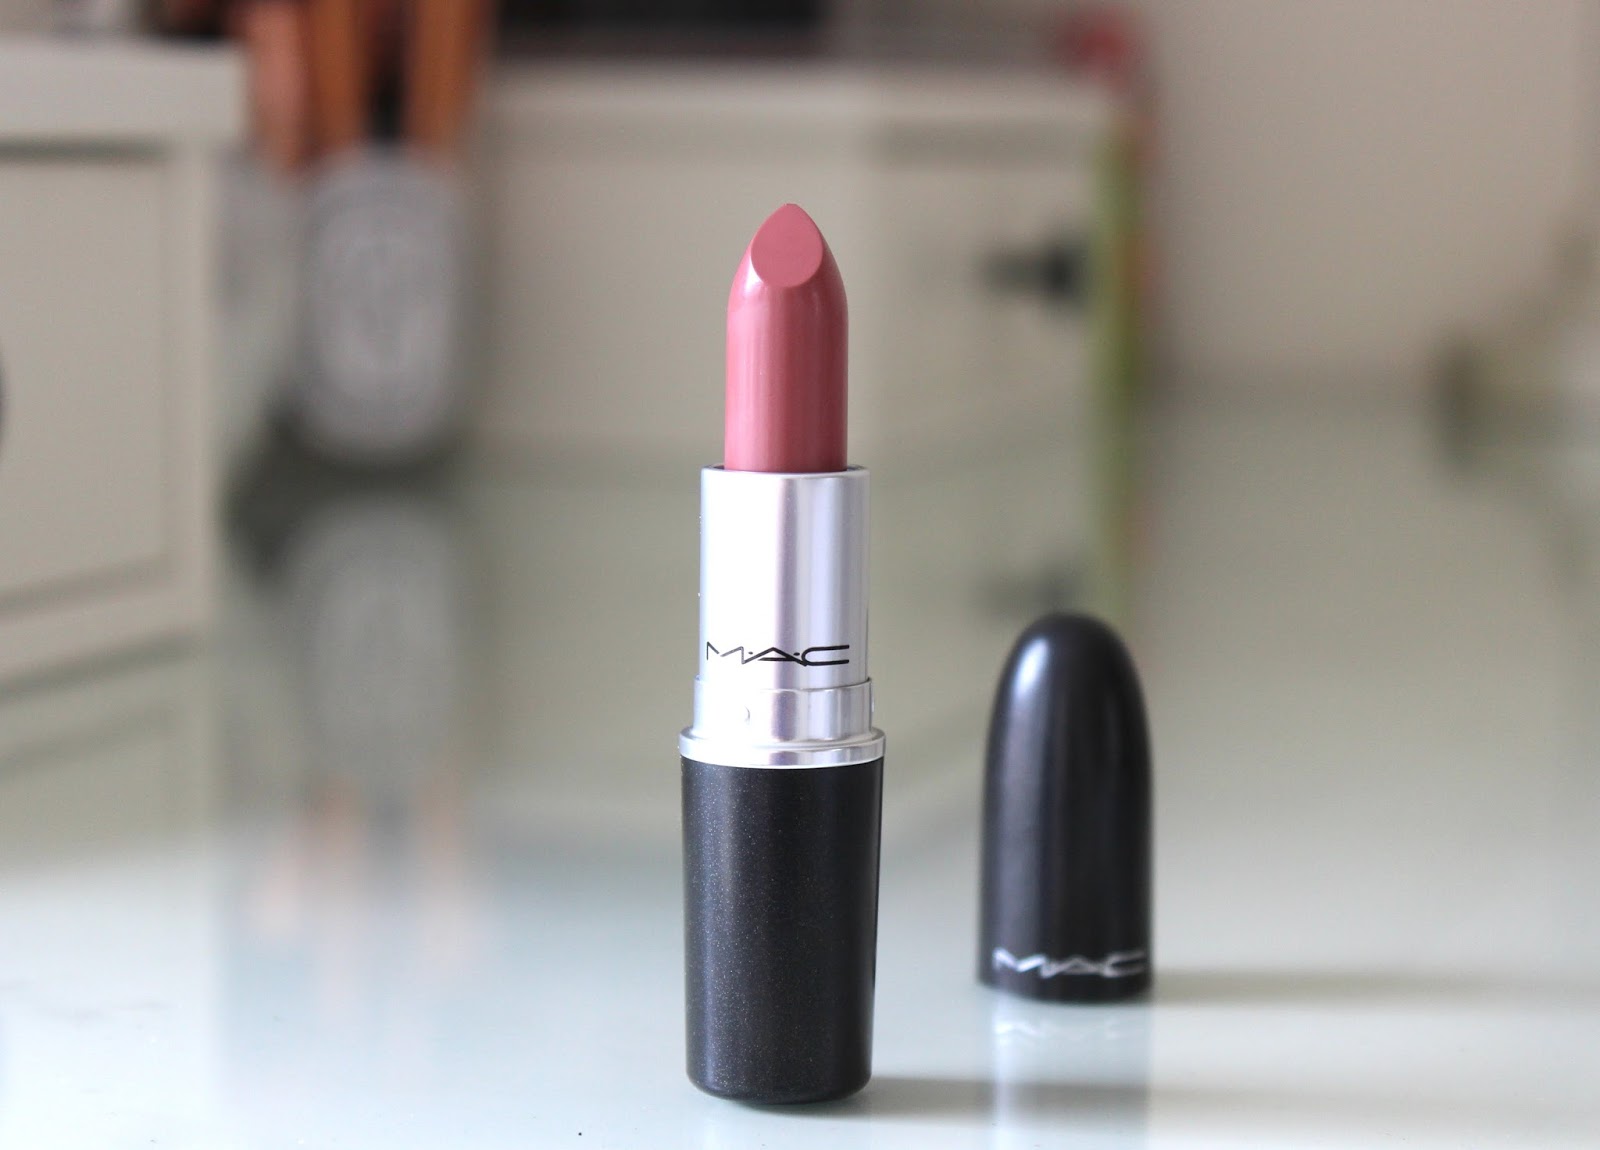
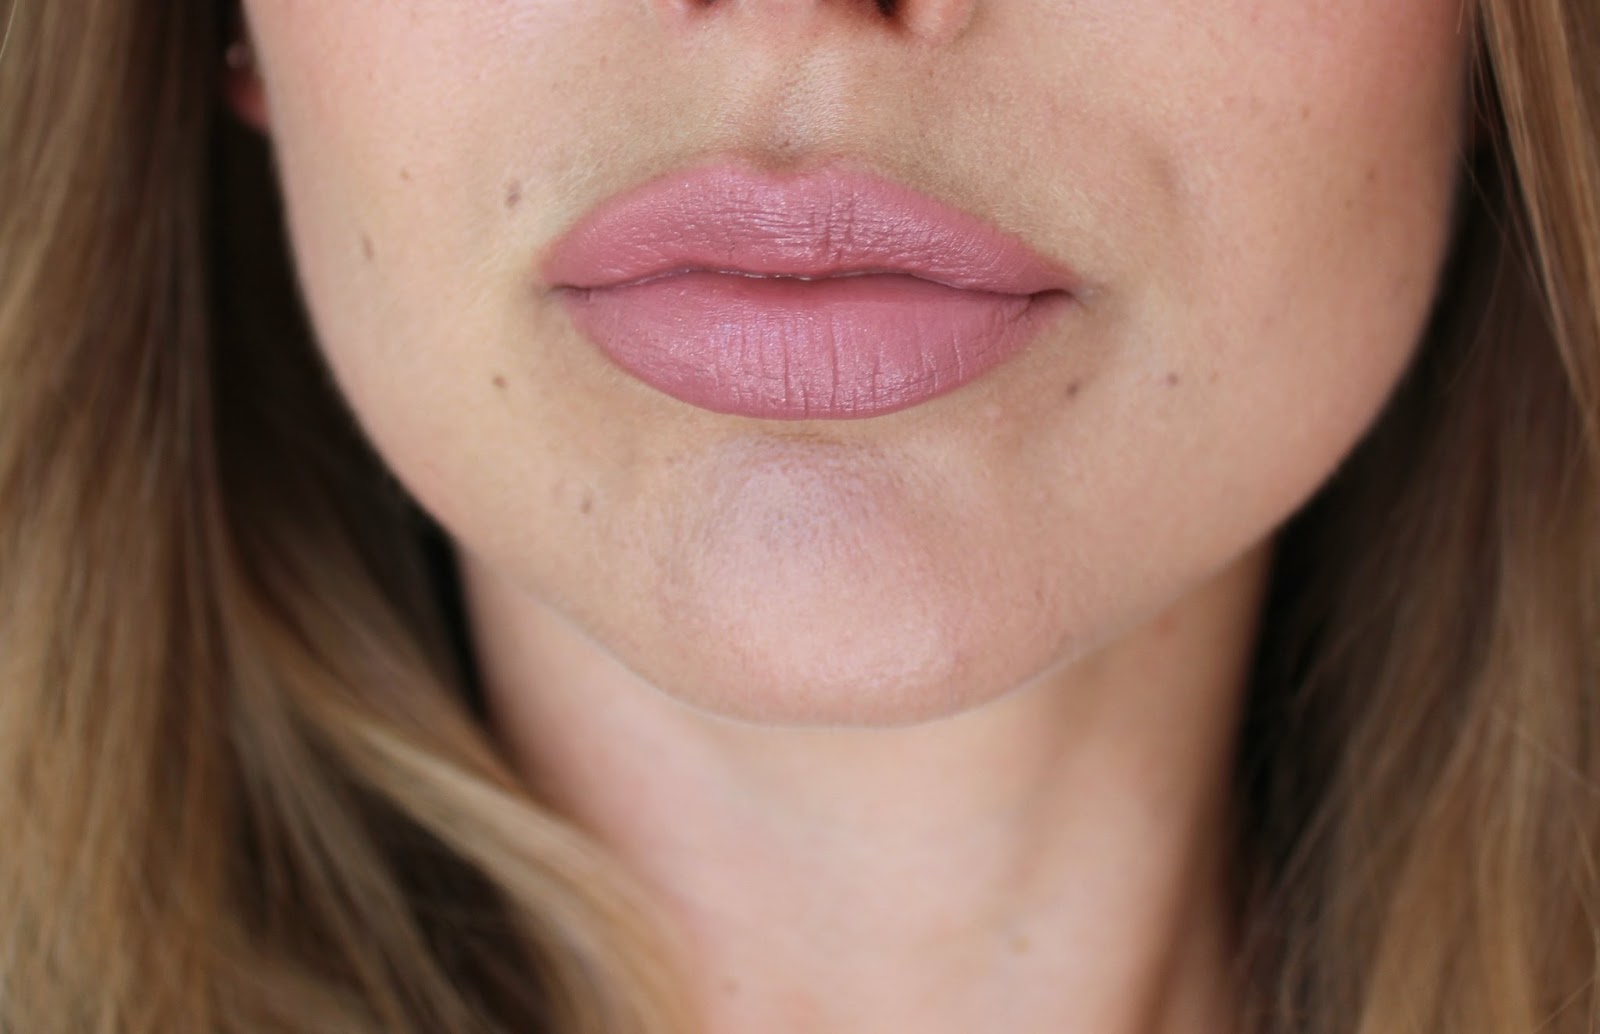
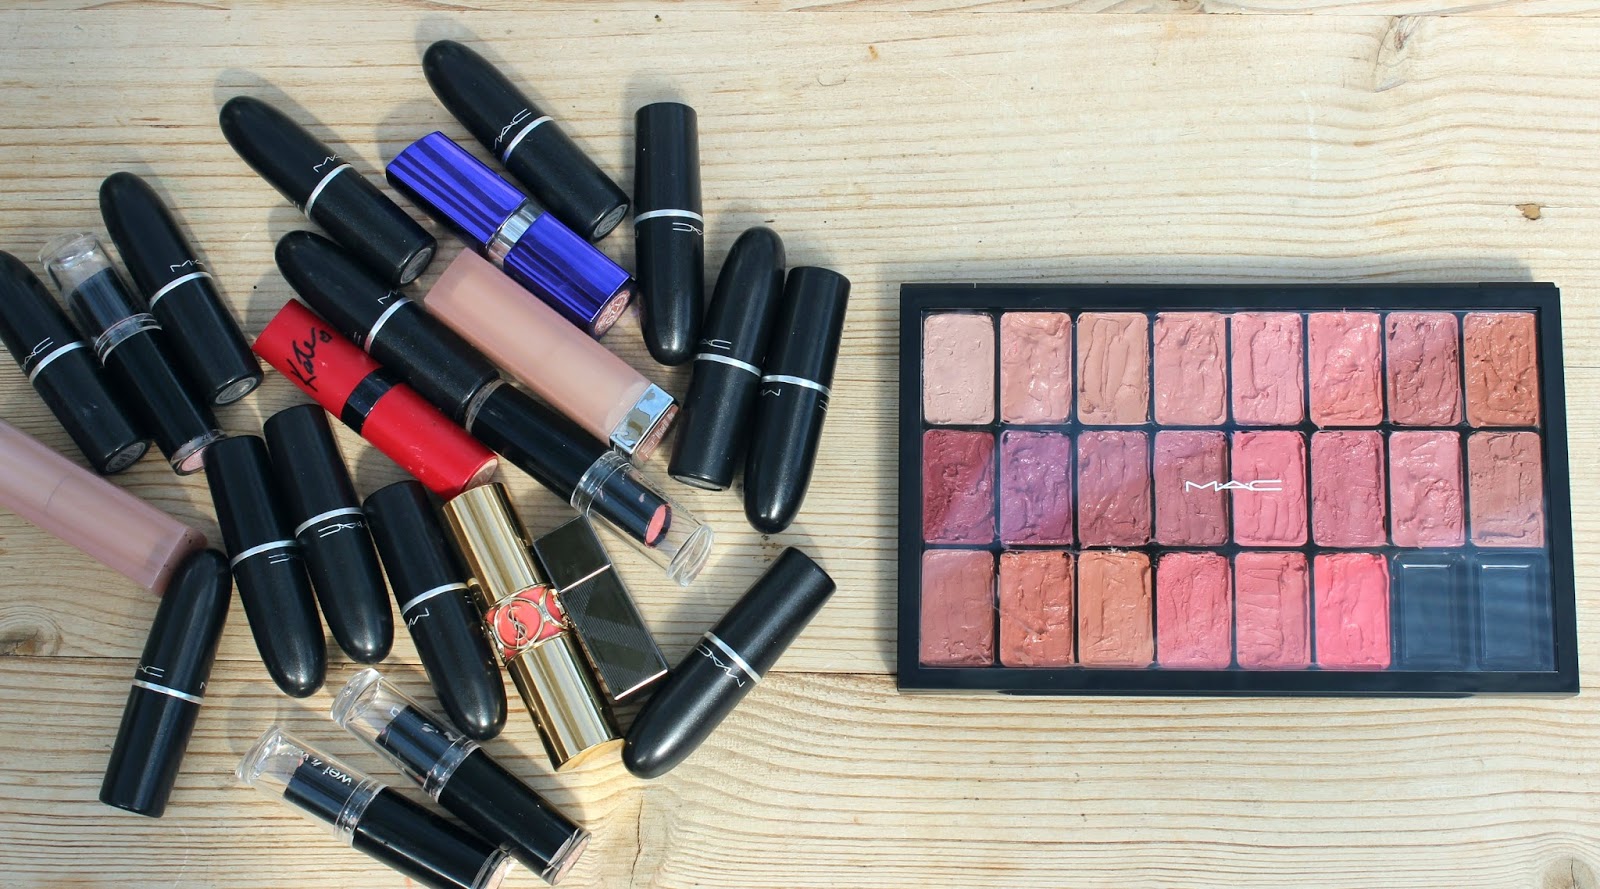
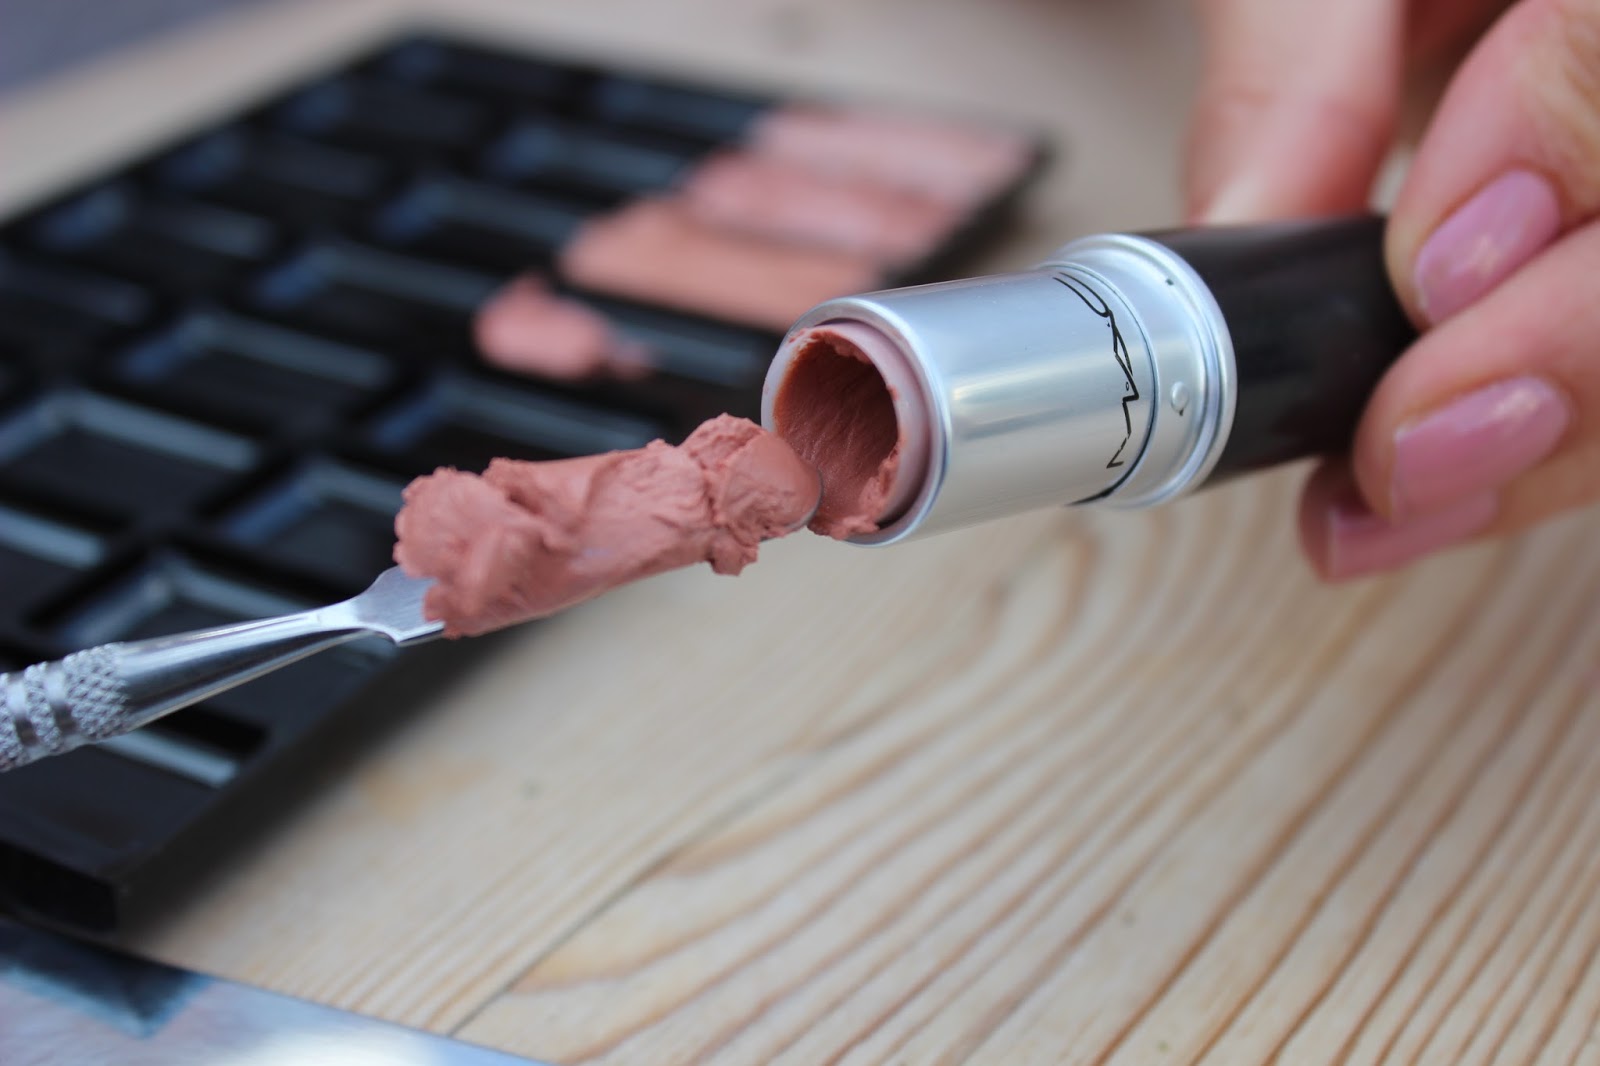
There’s only one reason I asked for another MAC lipstick – they’re so much cheaper in the US. $16 is about £10… that’s a lot better than £15.50! Can you believe this is my first MAC Matte lipstick (aside from RiRi Woo which is retro Matte) I’m usually a cremesheen girl… understandably I’m blown away with their staying power. Full post on this one coming soon!

 So that’s my Lorac-free US haul… Work on an invite to the next trip has begun!


Unsung Hero: Bobbi Brown Gel Liner

$
0
0

Bobbi Brown Gel Liner £18 has been providing bullet proof staying power for decades. In today’s fast-paced, launch-tastic, somewhat fickle beauty industry, few things stand the test of time, but when it comes to gel liners, Bobbi’s still unrivalled! It was just as I was opening a fresh jar, I realised it hasn't had the air time it deserves...

Okay, what makes it so special? For me, the first time I tried this, it was ease of use! I’d never used a gel liner, in fact I’d never used anything but a kohl pencil and I was blown away by how easy it was to apply and how professional my lines looked. If I want perfect flicks that last all day, this is where I go! And now that I apply make up on other people this has become even more of a god send. Have a look in any make up artists’ kit – I guarantee there’ll be a Bobbi Gel Liner in there… it’s a bridal make up must. Super rich and highly pigmented and jet black (Black Ink). It goes on black, dries black and stays, say it with me, BLACK! The formula, as the name suggests is a gel/cream. Soft and easy to work with, there’s just enough “play” time to before the product dries and once it does, it’s going nowhere! Applying the product with an eye liner brush, I like the MAC 210, it creates the most precise, perfect line, but if you want a messy, smoked-out look, simply smudge before it dries.

There’s only one minor bug bear with the product, and it’s true of most gel products, they dry out too soon. DO NOT LEAVE THE LID OFF FOR A SECOND LONGER THAN YOU HAVE TO. My top tip is once you’ve opened the lid and dipped your brush in, place the pot upside down on a flat surface to stop keep the air out mid-dip and as soon as you’re finished replace the lid securely. If you find it does dry out, I’ve got the perfect solution to breathe some life back into it… baby oil! There’s a whole blog post on how here.      

Bobbi Brown Gel Liner - the original and still the best! Who agrees?


#GoBronde... A Cautionary Tale

$
0
0

This isn’t the “ta-dah look at my lovely new highlights” post I hoped it would be. Sadly my DIY balayaye turned into a hair disaster but I wouldn’t be a very honest beauty blogger if I didn’t share the good, the bad and the downright patchy!

If you’ve been visiting these parts for a while now you’ll know I’m a fan of the L’Oreal Wild Ombre Kits. I’ve used them on myself twice before (see it here) with pretty good results, even my hairdresser was impressed. With two successful DIY jobs under my belt, me and my inflated confidence thought we were ready for the next trend, balayage. Cue L’Oreal #GoBronde. Have you seen the adverts? My hair queen J-Lo – I’m not a blonde, I’m a bronde! Yes, me too J-Lo. It’s a sign, let’s do this. 

A bit about the kits and the how to…


There’s five kits in the Glam Bronde range (£6/Boots), No 1 being the lightest, No 5 the darkest – I plumped for the “safe” middle option No 3 for light brown hair. They’re designed to give a brush-on balayage effect, adding subtle, blonde layers all over the hair for that just-back-from-holiday look. Similar to the Ombre kits they’ve very easy to use, instructions are clear, come with a “handy” triple-action expert brush designed to do the work for you etc. I even watched the recommended youtube video to pick up some tips, sadly I didn’t read any reviews!

My experience


Application was tricky! Unlike the ombre kits where you’re basically colouring in the bottom sections of your hair, balayage is designed to add small amounts of colour all over the hair. Application near the roots requires way more skills and I didn’t have a clue what the back looked like – it was a “reach-n-drag and hope for the best” approach. The brush ain’t all it’s cracked up to be. It does NOT distribute the product evenly, it dolloped the majority of the product at the roots, a patchy residue of colour in the lengths and by the time I got to the bottom there was nothing left. This meant I had to go back over at the ends, causing more patchiness. The instructions tell you not to apply too much pressure at the roots, and not to start too close to them, even with a light pressure and staggered starting points I still ended up with giant blobs of colour near the roots. Recommended development time is between 25 and 45 minutes, after 20 minutes my hair was already looking YELLOW! Sh*t, Sh*t, Sh*t– I quickly washed it, towel dried, looked in the mirror, gasped at the yellow/orangey streaks *Stay calm, stay calm* dried it, OH DEAR!   

The Results


Brassy, patchy and way too light. Bright blonde near the roots, orange/yellowy in the lengths. Obvious blonde clusters near the roots and around the back where I applied the product first, bright orangey blonde streaks near the front where my hair was already a bit lighter. All in all a complete disaster. Looked nothing like balayage, looked nothing like the box!

Did I mention this was on Friday night and I was going away for “surprise” weekend on Saturday morning! Cut to me spending the next hour panicking, asking google what do to, calling around hairdressers, texting my friends, more panicking. My regular hairdresser couldn’t get me in until Monday (and there was no way I wanted to go away for the weekend looking like THAT) thank heavens for the Metrocente (out of town shopping centre open until 9pm for those that don’t know). I actually went there with the intension of buying a hair colour stripper from Boots (worst thing I could have done) but fortunately stumbled across a hairdressers Sherlocks that managed to squeeze me in. They put a darker colour through my roots to disguise the blonde and a temporary toner through the lengths and ends to tone down and even things out. I was so grateful I nearly kissed the girl that did it. All in all I spent 5 hours and over £50 to end up looking, more or less, like a did before. Overall I’m a little lighter and a touch more “ginge” than I was to begin with but you live and learn and I will never do-it-myself again! NEVER!


Sorry about the lack of after photos – understandably the last thing on my mind at that point was a photo shoot. I did manage a dodgy quick snap in the hairdressers before the fix up began.

Lessons Learnt 


Read the reviews – I can’t believe I didn’t do this! I guess I was feeling falsely confident after my previous positive experience. I’ve since checked out the reviews and discovered most people have had a similar experience!
Don’t do it the night before you’re going away for the weekend!
Don’t leave it on for the full recommended time.
Don’t apply near the roots. 
Leave it to the professionals. There’s a reason hairdressers train. 

Have you tried the Bronde kits? Please share your hair disasters… it will make me feel better if nothing else. 


Call off the search. Perfect Base FOUND!

$
0
0

Call off the search! The quest for the perfect base is over… The aptly named Complexion Rescue!


Complexion Rescue Tinted Hydrating Gel Cream £26 is a game changer. A multitasking genius that combines skincare benefits and naturally radiant coverage in one. Think BB/CC/tinted moisturiser but better!

Remember back in April I went along to a bareMinerals event to mark the launch of Complexion Rescue. I came away with a sample and mused my early thoughts here. But to truly road test a foundation you need to wear it and wear it! How many of you have fallen in love with a foundation after one use, only to find it doesn’t agree with your skin a few weeks down the road? Well I was so impressed by my sample I purchased the full size product with my own hard earned cash - no PR sample or sponsored post here! I’ve worn it almost every day since April and now I can give you the real low down!

I’ll cut to the chase. It is unequivocally the best base I have come across. It’s my daily go-to. I’ve barely reached for any other base in the past four to five months. Initially I thought it might be more of an off duty base, but it actually provides more coverage than you might think! It alleviates the need for a heavy foundation, gives a smooth tint to the face and evens the complexion.

Formula and Application

Is it a gel? Is it a cream? The answer is BOTH! It’s lightweight and easy to apply like a gel, yet it’s rich and hydrating like a cream. Formulated with marine botanicals and mineral-infused water, it helps to replenish thirsty skin and lock moisture in. Oil, silicone, parabens and fragrance free – not only does it look good, it does good! It contains a non-chemical, mineral-based SPF 30, which doesn’t cause flash back. Completely fuss free application with the Smoothing Face Brush £24 – this nifty duo fibre buffs and smooths the product perfectly and allows you to easily build your desired coverage. Fingers work fine too and probably provide more of a sheer coverage. Either way it blends seamlessly with no demarcation lines.

Shades

There’s ten shades in the collection Opal 01 to Sienna 10. In April I was colour matched to Ginger 06, which was absolutely my perfect match. It’d say it’s ever so slightly on the lighter side now that I have some summer colour, I might have a look at Tan 07. For reference I’m MAC NC30/YSL BD 50/bareMinerals Original Medium Beige.

Coverage

Is completely up to you. It’s fairly sheer but you can build up the coverage where you need it. It layers exquisitely and will never look heavy or cakey. There’s enough oomph there to cover minor blemishes and discolouration without masking the whole face. If you like a full coverage – Double Wear, Studio Scuplt, that kind of thing, this won’t be for you. But me, I’ve been heading in the lighter coverage direction for a while now and this has come at precisely the right time. It provides more coverage than any tinted moisturiser I’ve used in the past, even Laura Mercier, I’d definitely place it more in the BB/CC category. I’ve actually come across some people using this under their regular foundation, which is great way to benefit from its amazing hydration and skin tone evening properties, without compromising on coverage.

Finish

One word – RADIANT! Never has a dewy, youthful-looking glow been so easy to achieve. My skin looks revitalised, hydrated, plumped! It evens out skin tone and creates a more flawless complexion without masking your natural radiance. My skin can BREATHE and somehow it gets better as the day goes on! The hydration, the radiance, it lasts! I apply a little finishing powder to my t-zone to avoid excessive shine and it lasts all day.

Price

RRP £26/$29/35ml Feel Unique | Debenhams | Sephora. Emphasis on 35ml, standard foundation size is 30ml so you’re getting more bang for your buck.

Complexion. Rescued! 


The Ultimate Brow Edit

$
0
0

This is it! The one you’ve been waiting for… The Ultimate Brow Edit. You know I’m brow mad – you guys tell me I’ve got good uns, I appreciate that (good brows is the new skinny, right?). There’s been some brow dramaz over the years, but thanks to RapidBrow (review here) my arches have been restored to their former bushy glory… well almost. I still need a little tweak to keep brows looking on fleek (sorry, I had to). 

This is everything in my brow arsenal, the tried and tested pencils, powders and pomades… 

HD Brow Palette £25– perfect colour match, never fails. 

You were my first! The one that changed it all. Others have come and gone, you’ve remained a constant. HD Brow powders are super pigmented, naturally matte, fantastically smudge-proof and seriously long lasting.  The Pro Eye & Brow Palette contains all the shades from HD Brows regular palettes, plus carbon – it’s basically a customisable brow wardrobe. A subtle gap-fill or full on scouse brow – this can do it all. Easy to use, simply brush, dab or spooly the powder where it’s needed for natural, long lasting brows. Full review and deats here.


The perfect choice for precise, strong brows!.So this one requires a little more effort and skill, but carry it off and you’ll arch out the competition. The formula is a stiff, creamy gel, which applied with a good angled brush (yup I love Anastasia’s Duo Brush 12) affords the most incredibly precision. It’s rich, super pigmented and completely smudge/sweat/water proof. So good, I have two shades… Medium Brown and chocolate. Full review here

Anastasia Beverly Hills Brow Wiz £15.50– Natural, Easy to Use  

There’s no denying Anastasia is le Queen of brows. If dipbrow aint your bag this gets the job done in a more discreet manner. Yes, it’s a pencil but used properly – short strokes, light touch, your arches won’t look drawn on. The tiny tip allows you to be precise and get right into those pesky little gaps and easily mimic natural hairs. Unlike most pencils, the formula is soft, almost powder-like and blends amazingly using the handy spooly on the opposite end. It’s one of the quickest, most fool-proof solutions in my arsenal. 


Benefit Gimme Brow £18.50–– low key/off duty all-in-one 

A magic little wand. It doesn’t just tint brows or comb them in place. It magics brow hairs where they don’t even exist. The innovative brush-on fibre-gel adheres to skin and hair, filling sparse patches and thickening brows naturally. The tapered brush is tinie-tiny and absolutely perfect for shaping and filling the hard to reach gaps. Of all the brow options, this is the easiest and quickest to use - sweep' n go! It's just a shame about the price - £18.50 for 3gs OUCH!


Anastasia Beverly Hills Clear Brow Gel £16.50– the finishing touch

If you’re bless with naturally full brows this could be all you need to tame/groom your arches. But for most of us this is an optional finishing touch. A slick of this after your pencil/powder/gel will keep your hairs in place and generally look more done – and this one doesn’t go crusty - bonus!

What are your go-to brow stylers? 


The $2 Lipstick better than MAC!

$
0
0

If you haven’t tried a Wet n’ Wild lipstick yet, WHAT ARE YOU WAITING FOR? If you live in America, hot-foot it down to your nearest drugstore PRONTO, if you’re anywhere else in the World, get clicking on Amazon NOW.

What makes Wet n’ Wild Megalast Lipsticks so special? Well aside for the $2 price tag (or 1 or 3 depending where you shop) the pigmentation is phenomenal. What you see is what you get. They’re completely opaque – one swipe is all it took for these photos. In fact, I was tempted to just upload the photos and let them do the talking, but then I do love to ramble on. Of all the lipsticks I’ve ever tried (MAC included), these have my favourite texture and finish. They have a unique crème-matte texture – they look matte but feel creamy. Application is effortless with a glide-on buttery texture and unlike most mattes, they don’t set or dry out, the creamy matte texture remains - rubbing your lips together is totally allowed! Wear time is also pretty incredible – they keep going around 3-4 hours and don't dry my lips out.

My love for Wet n’ Wild lipsticks began in 2013 in my first US beauty swap. I’ve now got seven Megalast Lipsticks in the collection and I'd happily have more…


Pink Suga– despite the name I find this more peachy than pink. I’d sum it up as a peachy nude.
Just Peachy– a lovely mid toned pinky peach
Bare It All– A brown toned nudey pink, bit of a Teddy Velvet Dupe.
Think Pink– this was my first WnW lippy, a pale blue toned pink similar to MAC’s much loved Crème Cup and Angel.
Don’t Blink Pink– a bright berry pink, reminds me a little of MAC impassioned but more pink.
Smokin’ Hot Pink– a vivid reddy/pink – like a strawberry.
Cherry Bomb– how delicious is this one! A true dark cherry red. Strangely it’s less Matte than the others, maybe more of a satin. Don’t be fooled by the picture, I know it looks super sheeny – that’s the sun.

My most used shade is Think Pink, but then I have had that the longest. My current fave is Bare It All, a perfect everyday nude. And looking at these swatches I need to wear Cherry Bomb right now! The only thing I don't love is the packaging... it's pretty cheap looking and lids sometimes pop off when they feel like it. But if they started tarting up the packaging, they'd be changing a lot more than $2. It’s what’s inside that counts!

Super pigmented, completely opaque, long-lasting and cheap as chips, what's not to love?


*You can pick them up in places like Walgreens for $1.99, or on Amazon for around £5 with postage*

HD Brows, More Than Just Brows

$
0
0

Apologies that it's been a little quiet around these parts lately. I beat myself up when I can't post as regularly as I'd like, but LIFE HAPPENS! I'm also full of cold right now (it's August, what's with that?) and all that nose blowing's done something to the brain cells. Bare with me, I'm doing my best...

They're synonymous with perfect brows, but did you know HD Brows also do make up? Or like me, you knew but haven't tried it yet? See, I'm a touch it, feel it, swatch it kinda shopper and since the make up line is only available online (but that could be changing, more on this later), it's put a barrier in my way. Then came along The Definition Tour. In a nutshell the lovely boys and girls from HD Brows travelled around the country doing demos and showcasing their wares. Finally i got to touch n feel n swatch and take home my top picks from the capsule collection...

Conceal & Correct Palette light/medium £25

I bought this with my bridal make up in mind but I've totally hijacked it for personal use. It's got the maximum coverage down! It's thick, yet creamy and feels almost lightweight. It packs a punch covering nasty blemishes, imperfections and the tricky under eye area. With three shades to chose from you can colour match to perfection all.year.round!


Eyeshadow Palette Foxy £29
This palette is hawt. You can pretty much create any look you want with this - day-to-night it's got you covered. A collection of beautiful warm earthy tones - browns, bronze and gold, with a mixture of matte and satin/shimmer finishes. Pigmentation is good, not great, but layer over a primer to help the shades pop. They blend beautifully and last all day.


Translucent Finishing Powder £20

Such an unassuming little pan but it's actually kinda special. A lightweight, silky finishing powder that works on all skin tones, it mattifies the skin without dulling it and leaves behind a suitable radiance.


Faux Lashes Bombshell £17.50

I haven't worn these yet but c'mon, just look at them. Blooming' gawjus! Perfect for adding some natural volume without looking like you're actually wearing fake lashes. They're also Francesca Neill's go-to lashes, so chances are Alisha Dixon, Rochelle Humes, Cheryl Fernandaz Versini et al wear them!


You can buy Make Up by HD Brows from Beauty Bay | LookFantastic and direct from HD Brows Watch this space for a flagship store coming soon... you heard it here first.


DEPOTTING LIPSTICKS - THE DIY PRO PALETTE

$
0
0


What's a girl to do when she's got more lipsticks than storage? Depot them of course!

I always fancied one of those Bobbi Brown Artist Palettes - a double sided palette with a 54 strong rainbow of lipsticks. Sadly the £190 price tag stands in my way. But with a £10 palette from MAC and a bunch of my own lipsticks I've made a decent dupe!

Depotting your lipsticks is a great way to condense your kit. If you're doing a job there's no point carting around 20-30 lipsticks. Not only does it take up vital space in your kit, but those bullets all look the same - it's no fun turning each one over the check the colour and it certainly ain't efficient! It's also the perfect solution for using up all those lipsticks you bought but barely use! 


With of Without Heat?

I'm depotting sans heat. You can melt your lipsticks in the microwave or on a tea spoon over a bare flame but, and it's a big BUT, it can change the formula of the lipstick. Lipsticks with shimmer tend to separate and mattes never quite return to matte. Yes it looks tidier but be warned, you might spoilt your lippy.


What to depot your lipsticks in to?


Let's talk containers. There's lots of options - JaponesqueVueset, Muji or some kind of pill box or button storage. I went down the MAC route because it's a pretty cheap solution and let's be honest, it looks the part. The large pro palette cost £10 and the insert's £2.50. The wells are quite small, they hold around a third of the lipstick - that's a third of the palette and two thirds for you!

Before you start...

Organise your lipsticks. I'm not gonna lie, this was my favourite part. I played around with every possible order - light to dark, A to Z, before I finally settled on a colour order - Nudes, pinks, browns then peaches. Make a note of what's where... it's a lot harder once they've been depotted. At some point I may even get a label maker and pop the shades underneath the palette.

What you'll need

Lipsticks - OF COURSE!
A palette or pill box
Spatula 
Chopping board 
Kitchen Roll
Wipes
Cotton buds (Qtips)


How to Depot Lipstick

1. Make sure your palette is cleaned/sanitised. 


2. Take a spatula and behead your lipstick. My sister watched open-mouth during this part, but worry not, we'll reattach it later.


3. Scoop out all the lipstick inside the tube - You won't believe how much product is hiding down there. 


4. Pop the product into the well. Push it down and smooth over with the spatula. Don't worry if it's messy, you can clean up once you're done. 


5. Stick the pointed head of the lipstick back in the bullet - good as new! 

6. Repeat for each well - yup, it's a labour of love, and wipe your spatula or palette clean with kitchen roll or tissue between each one.


7. Take a wet wipe and some cotton buds and tidy up the sides.


8. Pop the insert back into the palette and voila...


Yes, I realise there's two empty wells. Makes sense to leave a couple of spares for the lipsticks I haven't bought yet. Next, I'm going to do the same for my brights, berries and reds!

Don't forget if you've emptied out any MAC lipsticks, back2MAC them.


Viewing all 195 articles
Browse latest View live